Special requests between you and professional cleaners become successful when you provide all necessary information before their initial visit.
The cleaning team can prepare their equipment and schedule their work based on the information they receive about your home requirements.

Why Special Requests Matter
Protect outcomes and trust
The team will reach your desired results through specific instructions that eliminate any chance of misreading the information.
The team will avoid mistakes by following your instructions, which prevents them from using incorrect products in your home.

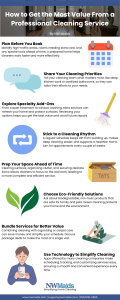
How to Request Add-On Cleaning Services From Professional Cleaners
Write your request list in plain language
The cleaning process becomes more efficient when you use short statements that specify areas and work assignments and state your expected outcomes.
For example, the kitchen cleaning process should include stovetop degreasing and hood exterior wiping, according to your request.
Flag health, scent, and allergy needs
You need to warn the cleaning team about your fragrance sensitivity before they begin their work.
You should ask about the cleaning products the company uses and request fragrance-free alternatives when needed.
The cleaning team should keep all supplied products in one designated area that you label for their convenience.
Call out delicate materials and high-value items
The team needs to know about stone, natural wood, and specialty finishes because these materials require specific cleaning methods.
The team needs to determine which areas require protection and which cleaning procedures should be followed.
The team should store their cleaning equipment in a designated area that you select in advance.
Give access notes that remove friction
You should send all access information, including gate codes, parking rules, and lock details, before the visit.
The same message should include all rooms that should remain off-limits, pet care instructions, and alarm operation procedures.
Use photos for tricky areas
Your area should maintain both cleanliness and organization because you need help at that time.
You should specify the baseboard cleaning method you prefer, whether that is a light surface wipe or complete hand cleaning.
You should specify your dish-handling preferences by choosing between loading the dishwasher, hand washing, or leaving them untouched.
Agree on what “done” looks like
The team needs to check whether your requested change fits within the existing time block of your appointment.
The schedule ensures all team members receive equal work assignments while avoiding any unexpected urgent work.
Ask for a time and price check before adding work
Select one person to handle all your communication needs, including sharing updates, answering questions, and approving changes.
The team will keep all members informed through this method, which prevents unexpected misunderstandings at the last minute.
Respect safety limits and legal boundaries
The service team should only perform tasks that fall within their standard service scope.
The company needs to show their safe work abilities to you before you bring in a specialist for particular jobs.
Build feedback into the routine
After the cleaning service completes their work, you should provide two pieces of feedback that include positive aspects and specific areas for improvement for future visits.
The team needs access to your written feedback because they will need it during the upcoming appointment.
Use a simple checklist for repeat visits
Create a short recurring list after you determine your preferred cleaning schedule.
The team can maintain high standards through extended service periods, which prevents them from taking shortcuts.
Know when to upgrade the service level
The service needs to continue until you reach your target quality standards, without making concessions or adjustments.
Choose a service that welcomes clear communication
A reliable service provider will request information, verify all details, and document all customer preferences.
The housecleaning service, NW Maids, provides excellent service to its customers.
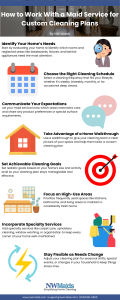
State what you will handle before they arrive
You should place clean sheets in each room after making the beds. The team should avoid performing any laundry tasks when you have specified no laundry handling.
The team should understand your personal item organization plan so they can focus on cleaning tasks instead of item organization.
Rank requests by priority
The team needs to complete their three essential tasks for the day before they start working on any other assignments.
The team maintains its current production rate because they need to focus extra time on a particular area.
Decide how you want products used
The cleaning team needs your permission to use your personal cleaning products.
The company delivers products to customers who need fast and dependable results.
You should inform them about your preferred cleaning products and provide information about any surface-specific rules, such as bleach avoidance on colored grout and the prohibition of oil-based polish on wood surfaces.
Set a simple prep routine for your household
The cleaning team needs to follow specific access rules that depend on how long the preparation area remains available.
The team needs you to move toys to storage, organize papers, and clear all surfaces before they can perform a complete cleaning.
The team needs you to clear out the inside of your fridge and oven before they can start their work.
Plan for pets, kids, and noise
The cleaning team should select a room or crate for your anxious pet to stay in during the cleaning process.
The team needs to know your work hours so they can stay out of your workspace during meetings. The team needs to follow these minor details to keep your home comfortable while avoiding any disruptions.
Confirm what counts as off-limits
The company should inform you about their service restrictions, which include heavy lifting, sharp-waste disposal, and ladder access.
Understanding service restrictions lets you plan individual service times for these particular operations.
Keep notes on what worked
The number of appointments you complete will reveal which specific requests produce the best results.
The team should receive your template message that contains product rules, access details, and top priorities, so each visit starts with a clear understanding.

Conclusion
- How to Evaluate a House Cleaning Contract Before Signing
- How to Repurpose Graywater Effectively and Safely at Home
- How to Get the Most Value From a Professional Cleaning Service
- Top Mistakes People Make When Scheduling Home Cleanings
← How to Work With a Maid Service for Custom Cleaning Plans
Weekly or Biweekly Cleaning: Find the Right Schedule for Your Home →