A room can be completely rejuvenated by adding a fresh layer of paint, altering its aesthetics and ambiance.
However, after completing the painting process and admiring the painted walls, the task of cleaning up, especially when it comes to cleaning paint rollers, can seem overwhelming.
Fret not!
In this guide, we’ll share expert advice on how to clean your paint rollers so they’re all set for your next project in an instant.
Recognizing the Importance of Clean Paint Roller
Before diving into the cleaning procedure, it’s important to grasp why maintaining clean paint rollers is crucial. Cleaned rollers not only ensure smooth paint application but also extend the lifespan of your painting equipment.
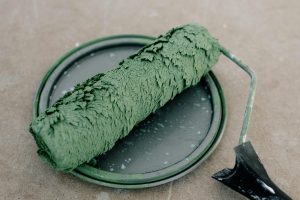
Failing to clean your rollers properly can lead to dried paint residue accumulation, affecting their performance and potentially causing streaks or patchy coverage in painting projects.
Essential Supplies
Prepare all materials before starting the cleaning process.
Here’s what you’ll need:
- Paint Roller
- Drop Cloth or Newspaper
- Bucket
- Gloves
- Paint Roller Cleaner
- Utility Brush
- Water Source
Step-by-Step Guide for Cleaning Paint Rollers
To restore the shine of your paint rollers, follow these easy steps:
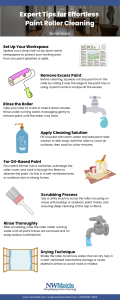
Step 1: Set Up Your Workspace
Spread out a drop cloth or lay down some newspapers to protect your working area from any paint splashes or spills. This will clean up and prevent any mess from spreading.
Step 2: Remove Excess Paint
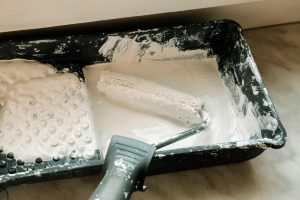
Before starting the cleaning process, squeeze out any paint from the roller. To accomplish this, either roll it over the edge of the paint tray or use a paint comb to scrape off any extra paint.
Step 3: Rinse the Roller
Take your roller to a sink or an outdoor space with a hose. Hold it under running water and gently massage it with your hands to remove any remaining paint. Keep rinsing until the water is clear and all traces of paint are gone.
Step 4: Apply Cleaning Solution
Fill a bucket with warm water and add a bit of paint roller cleaner or liquid dish soap. Swirl the roller in the solution, making sure all surfaces are well covered. Allow it to soak for a few minutes to help dissolve any paint residue.
For Oil-Based Paint
Pour a small amount of paint thinner into a bucket or container. Submerge the roller cover in the paint thinner and work it through the fibers to dissolve the paint. Due to the strong fumes from the paint thinner, this step must be done in a well-ventilated area or outdoors.
Step 5: Scrubbing Process
Use a utility brush to scrub the roller, paying attention to areas with buildup or stubborn paint marks. Focus on the roller’s nap or fibers to ensure deep cleaning.
Step 6: Rinse Thoroughly
After scrubbing, rinse the roller under running water until all paint traces are removed and no soap residue is left behind.
Step 7: Drying Technique
Remove water from the roller by shaking it, and let it air dry thoroughly in a well-ventilated space before storing or using it again. Ensure airflow during drying to prevent mold or mildew growth.
Taking Care of Your Paint Rollers
Now that your paint rollers are gleaming clean store them in a place away from direct sunlight to preserve their pristine condition. Use roller covers or plastic bags to shield them from dust and debris when not in use.
Effortless Cleaning for Excellent Results
Cleaning your paint rollers doesn’t have to be overwhelming.
By following these steps and making sure to maintain your paint rollers regularly you can keep them in shape for whenever you need them.
Remember, a clean paint roller not only helps you achieve smooth paint application but also prolongs the lifespan of your painting tools, ultimately saving you time and money in the long term.
If you need a home cleaning service, consider NW Maids.
With our team and commitment to providing top-notch service, we’ll make sure your house shines inside out, allowing you to focus on what matters.
Get in touch with us today to discover NW Maids exceptional service!
Related Posts:
- Disinfecting Kitchen Surfaces: A Step-by-Step Guide
- Expert Tips and Techniques on Deep Cleaning Your Oven
- Vinegar Cleaning Solution: Your Natural Home Cleaning Ally
- The Complete Guide to Cleaning Your Engine Bay


